
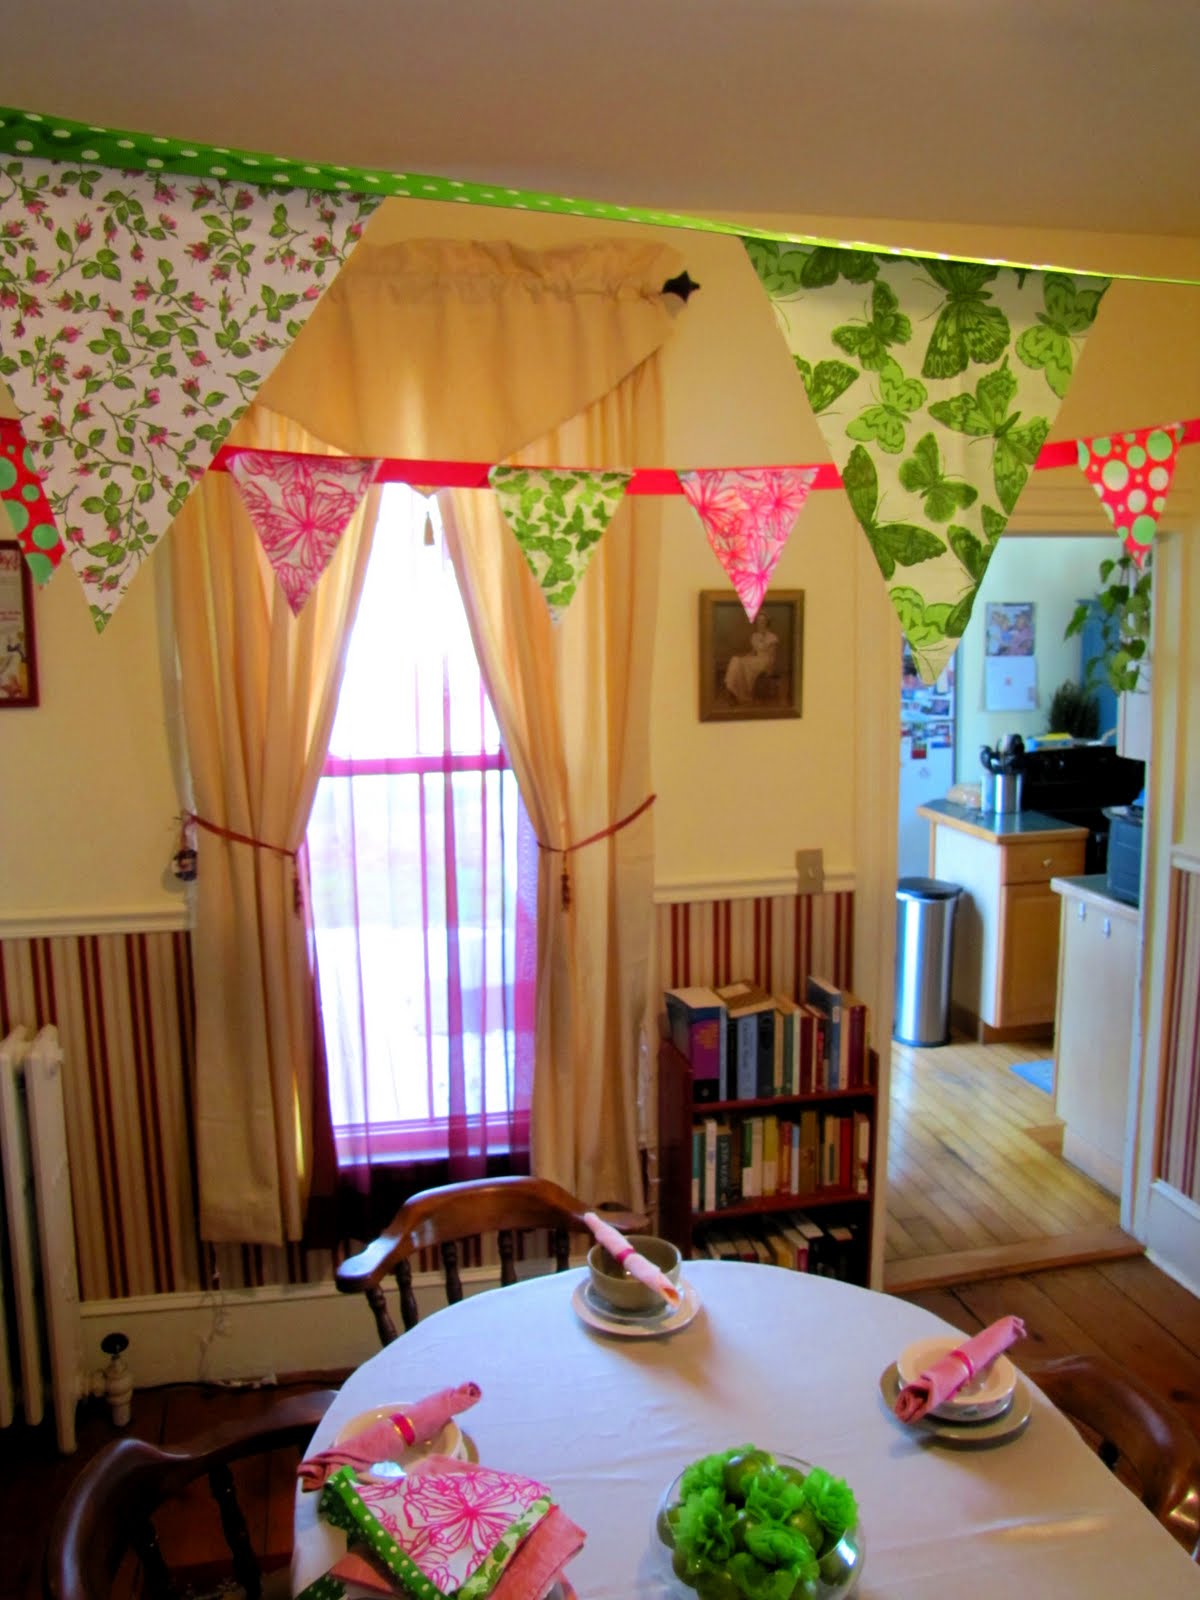
I'm pretty sure I'm the last person on the planet to learn to make super easy decorative penant banners, but just in case some of you are as behind the times as I am, I thought I'd do a quick tutorial on how I made the no-sew banners that hung in our dining room on Mother's Day.
First, full disclosure: I don't own a sewing machine. Sewing these banners would definitely be faster, and also very simple, but because I'm machine-less, I just picked up some iron-on adhesive (under $4) and Fabric Fusion liquid stitch (also under $4). Okay, on to the how-to.
To start, pick out some fun fabrics with big, bright patterns. Since the actual penants won't be very big, I think they look prettiest when they are in bold colors. I chose a mix of pink, white, and green fabrics (all under $3 a yard).

Trace out a triangle on cardstock or other heavy paper (I used a manilla envelope), in the size that you want. My triangles were roughly 8" on all sides. For my first few cutting attempts, I pinned the manilla triangle to my fabric so I'd have a more even cut, but I got a little sloppy towards the end and just held the triangle in place to get a roughly even cut all around. I ended up making 3 banners, all on 9' ribbon, with 6 or 7 triangles on each.

Once the triangles were all cut out, I stretched my ribbon out a little at a time and applied either a thin line of the liquid stitch (shown here) on the back of the ribbon, or ironed on a strip of adhesive. Having done both, I actually don't have a preference for one over the other, but I think the liquid stitch is just the easier and faster choice.

Place the triangle (pattern side down) on the ribbon, and press into place. The Fabric Fusion took just a few minutes to adhere enough for me to feel comfortable moving the ribbon around to continue attaching other penants in place, and several hours to dry fully.

Once the glue is dry, admire your handiwork and hang up to make any space more festive! Since our dining room is wider than the length of the ribbon I used, I ended up stringing some extra ribbon onto either end and pinning that smaller ribbon into our walls. It would also look pretty just to hang the banners right up against the wall!


Easy, right? If you all are interested, I can also do a DIY tissue-paper flower how-to post this week to show how I did the easy little fluffy flower chains that also decorated our Mother's Day lunch. They are probably my most-used crafty decoration ever because they are easy and SO pretty. I made tons for Natalie's birthday party, and they are my go-to craft project at work when I need a simple task for the kids I work with that also produces quickly satisfying results. Just lemme know if you're interested and I'll show ya how!
Oh, and if you're now madly in love with penant banners, check out some of the cutest ones on the whole interwebs:
little Poppy's birthday cake banner
milla plum's mini cake banner
this gorgeous paper version
or this sewn version, with tutorial
First, full disclosure: I don't own a sewing machine. Sewing these banners would definitely be faster, and also very simple, but because I'm machine-less, I just picked up some iron-on adhesive (under $4) and Fabric Fusion liquid stitch (also under $4). Okay, on to the how-to.
To start, pick out some fun fabrics with big, bright patterns. Since the actual penants won't be very big, I think they look prettiest when they are in bold colors. I chose a mix of pink, white, and green fabrics (all under $3 a yard).

Trace out a triangle on cardstock or other heavy paper (I used a manilla envelope), in the size that you want. My triangles were roughly 8" on all sides. For my first few cutting attempts, I pinned the manilla triangle to my fabric so I'd have a more even cut, but I got a little sloppy towards the end and just held the triangle in place to get a roughly even cut all around. I ended up making 3 banners, all on 9' ribbon, with 6 or 7 triangles on each.

Once the triangles were all cut out, I stretched my ribbon out a little at a time and applied either a thin line of the liquid stitch (shown here) on the back of the ribbon, or ironed on a strip of adhesive. Having done both, I actually don't have a preference for one over the other, but I think the liquid stitch is just the easier and faster choice.

Place the triangle (pattern side down) on the ribbon, and press into place. The Fabric Fusion took just a few minutes to adhere enough for me to feel comfortable moving the ribbon around to continue attaching other penants in place, and several hours to dry fully.

Once the glue is dry, admire your handiwork and hang up to make any space more festive! Since our dining room is wider than the length of the ribbon I used, I ended up stringing some extra ribbon onto either end and pinning that smaller ribbon into our walls. It would also look pretty just to hang the banners right up against the wall!

Easy, right? If you all are interested, I can also do a DIY tissue-paper flower how-to post this week to show how I did the easy little fluffy flower chains that also decorated our Mother's Day lunch. They are probably my most-used crafty decoration ever because they are easy and SO pretty. I made tons for Natalie's birthday party, and they are my go-to craft project at work when I need a simple task for the kids I work with that also produces quickly satisfying results. Just lemme know if you're interested and I'll show ya how!
Oh, and if you're now madly in love with penant banners, check out some of the cutest ones on the whole interwebs:
little Poppy's birthday cake banner
milla plum's mini cake banner
this gorgeous paper version
or this sewn version, with tutorial
Love this banner! I too am way behind so love that you did a how to! Thanks for your comment, the lashes are petty amazing. ;)
ReplyDelete